|
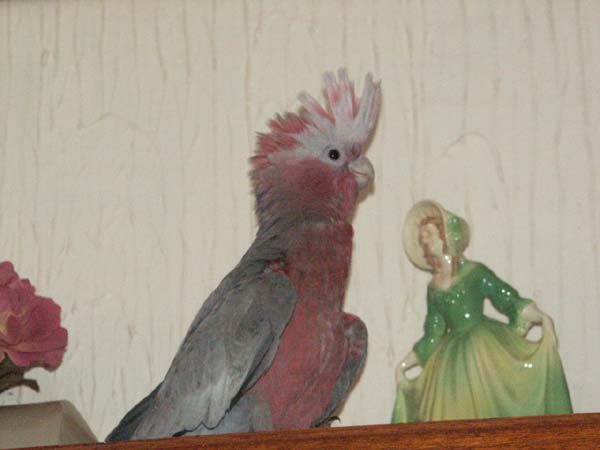
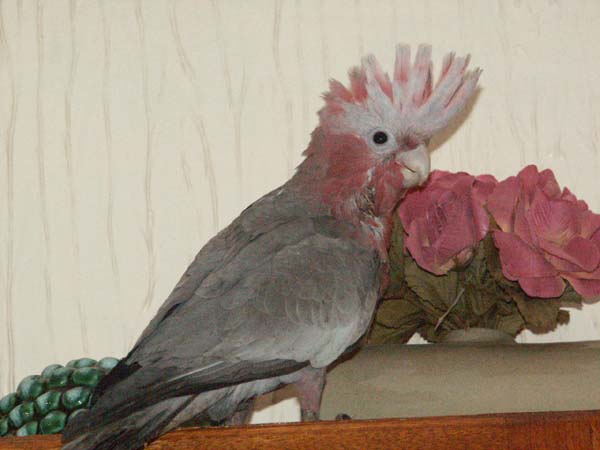
PIPPIN the GALAH |
Photo Gallery - from
HATCH To WEANING
As
you can see they grow like Ostriches!
|
|
plus HAND-REARING INFORMATION and ADVICE
|
|
|
|
|
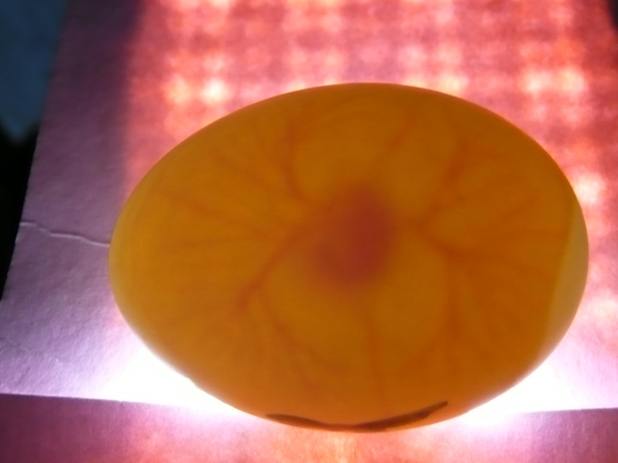
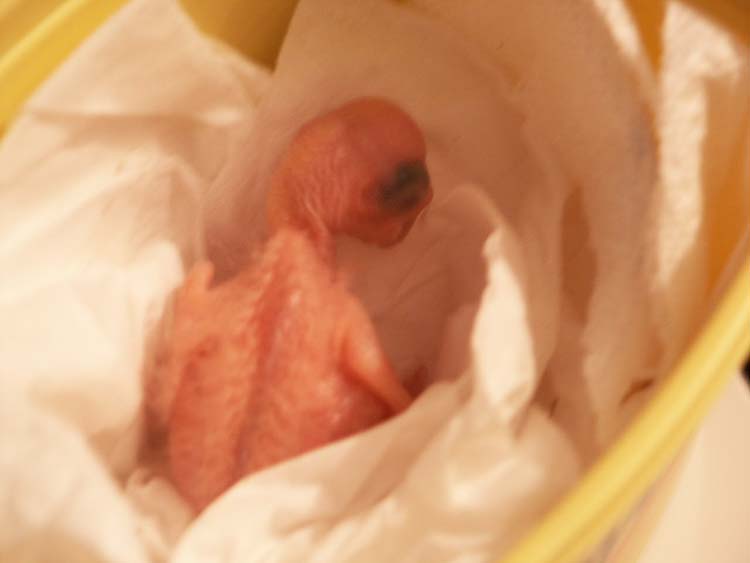
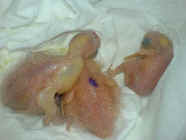
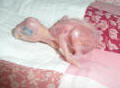
Pips just hatched > Eggshell
10.2grams hatch weight
Egg Incubation Period 25 days |
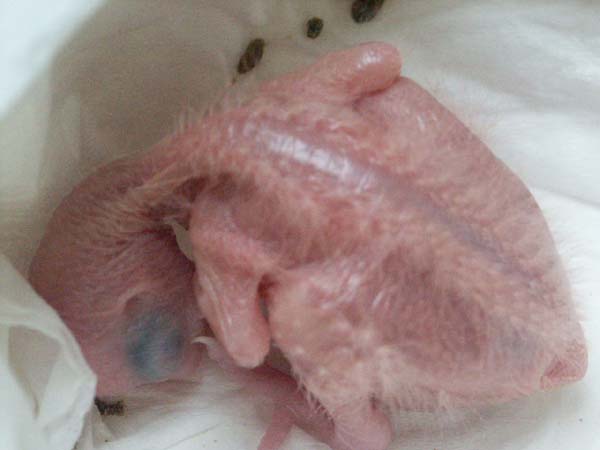
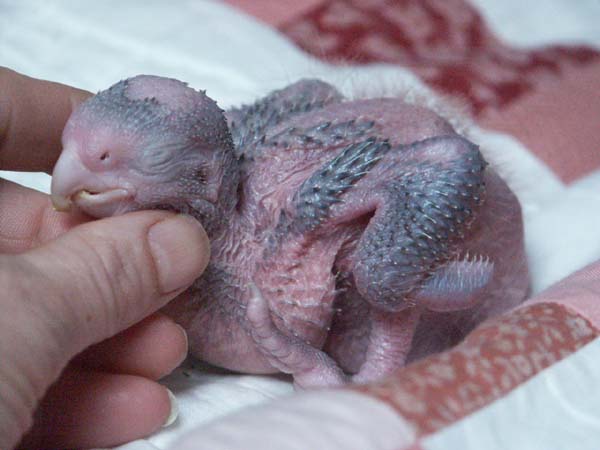
Pippin 1 Day old -
11.2g - 9 feeds
Compare size with 2 photos below
Incubator 36.85deg C. 55% H |
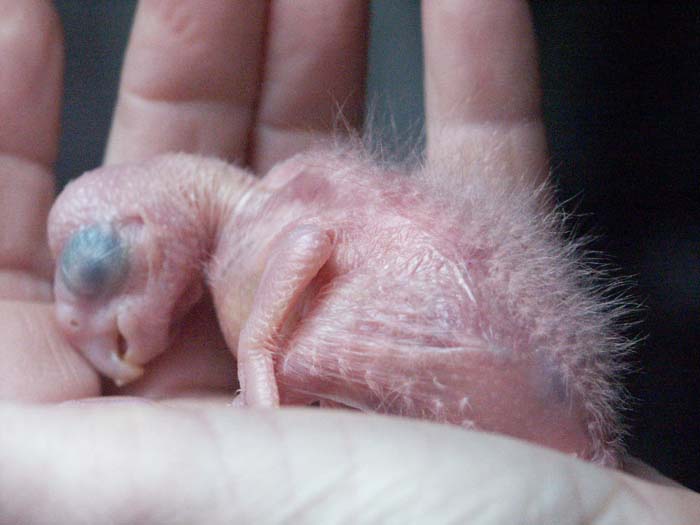
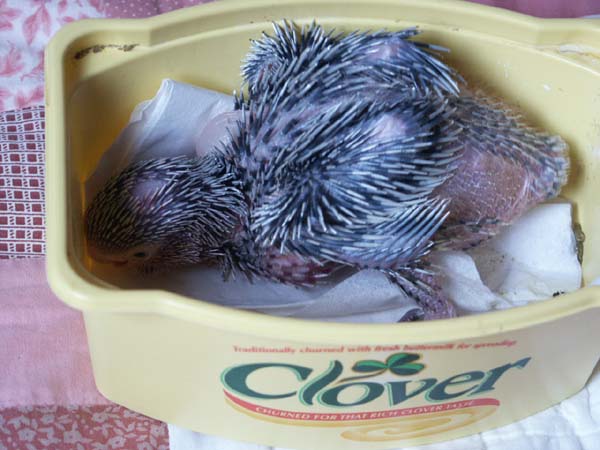
Pips 3 days old
14.1grams 9 feeds per day |
|
|
|
|
|
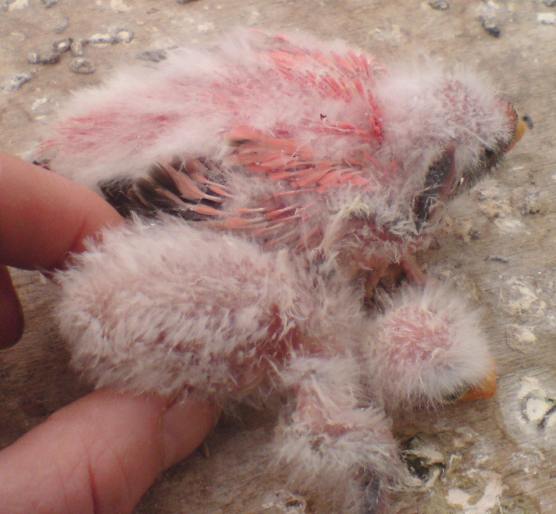
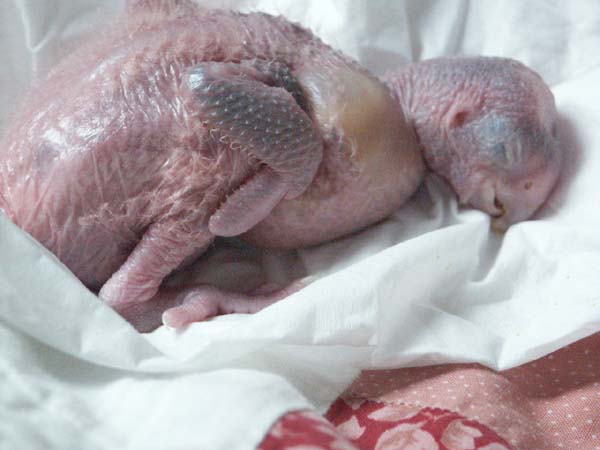
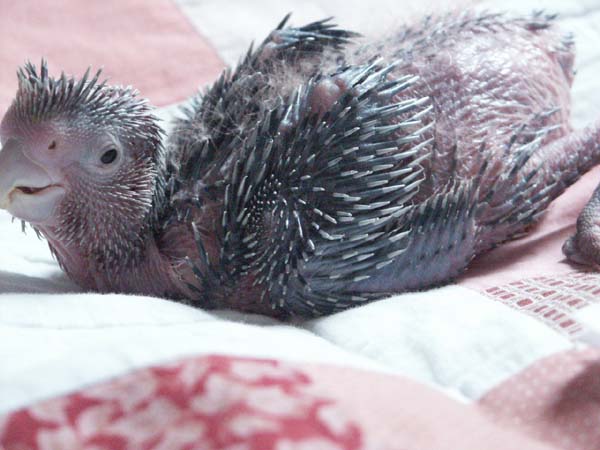
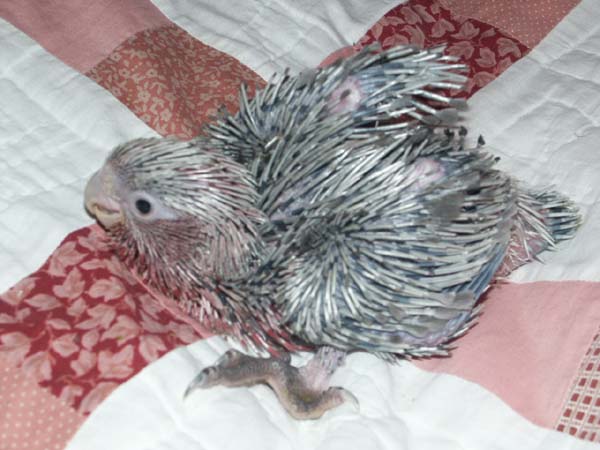
5 days old (pink fluff)
23.1g. 7 feeds per day |
6 days
27.6g - 7 feeds per day
Sleep and eat most of the day. |
10 days-
starting to show grey in wings & head. Eyes start to slit.
71.6 grams - 6 feeds per day |
|
|
|
|
|
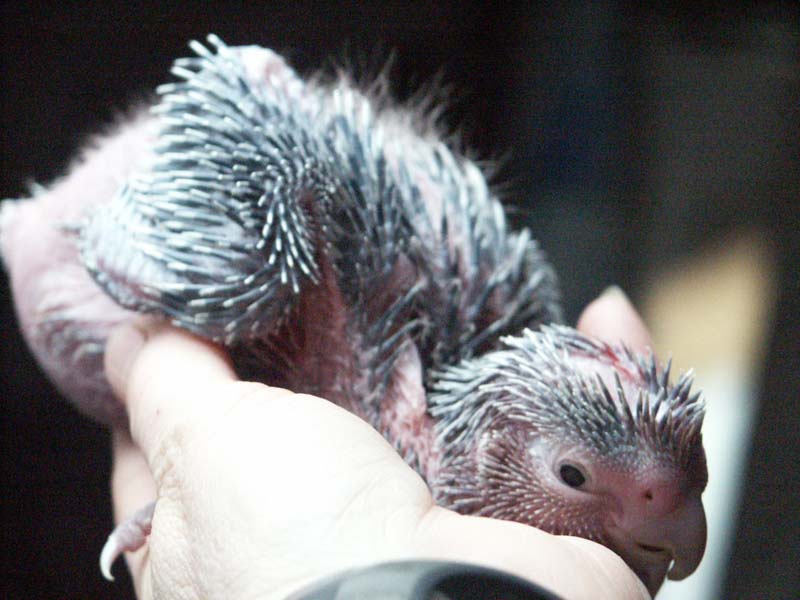
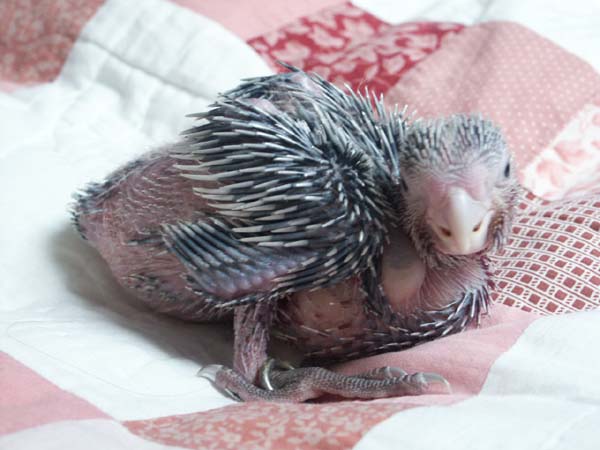
14 days - Feather quills starting to
come thru on wings and head. Eyes 1/2 open but she's too lazy to open them. 100.8grams |
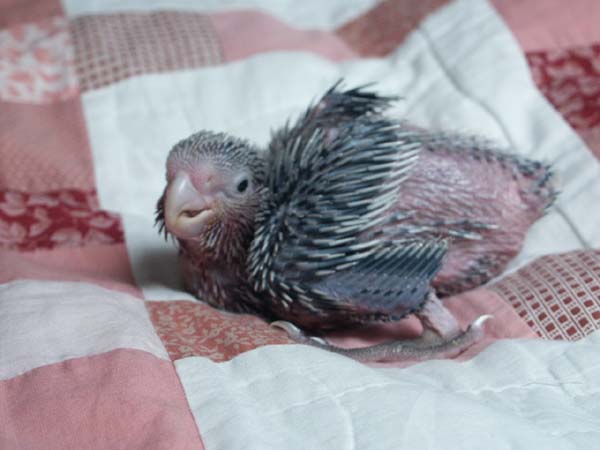
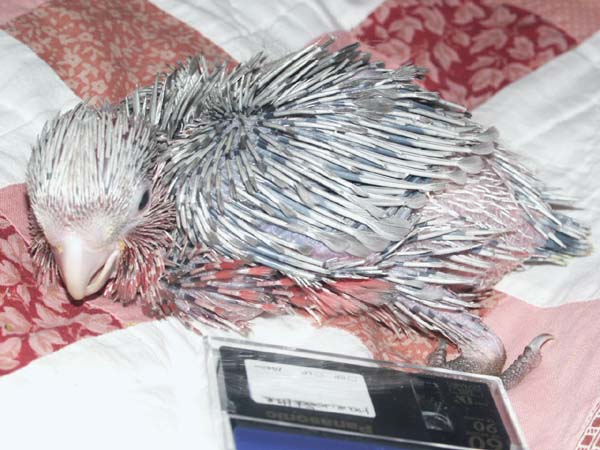
17 days - Feathers developing well.
Eyes well open. Compare size with above.
178.8grams 5 Feeds per day
|
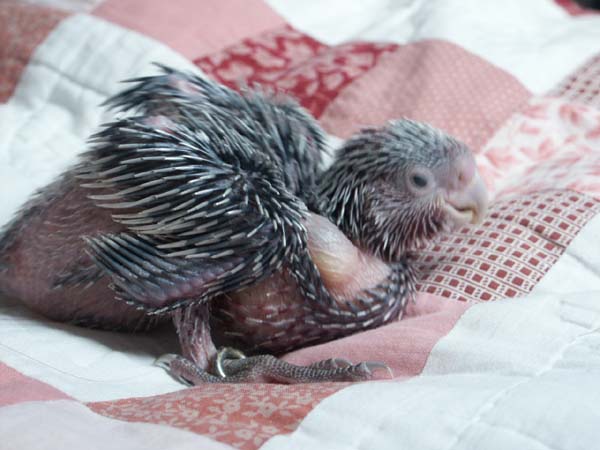
17 days - Alert & showing feather
development a little more clearly.
feeding approx every 4 hours thru day to midnight - approx 7:30am to empty crop. |
|
|
|
|
|
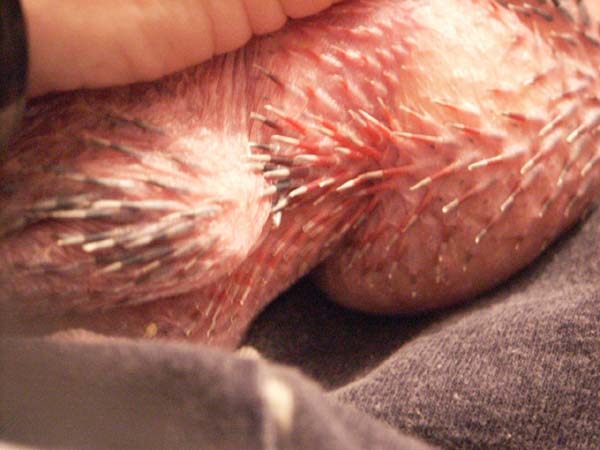
17 days - Close-up of full crop & chest
area showing feather development. |
18 days - Feathering up well, Close
Rung - legs a lot stronger. Eyes alert.
211 grams - 4 Feeds per day
|
18 days diff. view to show the body has
less feathering than wings / head. The body tends to start to
feather-up in lines. |
|
|
|
|
|
19 days -
Compare size & feathering to Photo @ 31 days in Marge Tub below, middle
220grams - 4 Feeds per day
|
19 days - growing well. Look at the size
of her crop - she eats for England. |
22 days - feathers coming out of quills
and Red feathers emerging from quills, evident on chest.
278 grams |
|
|
|
|
|
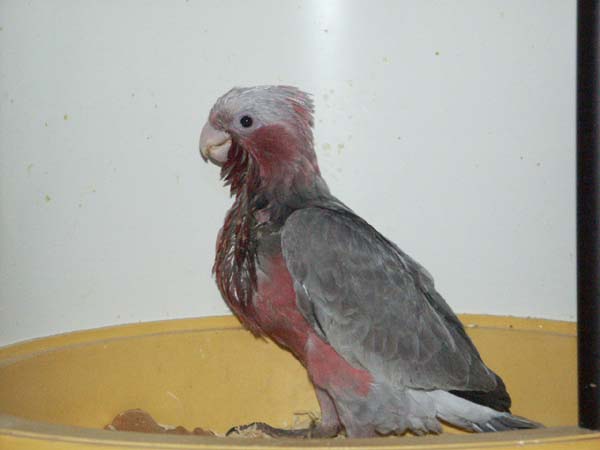
23 days - Look at
the size of her feet!
Red showing on cheeks and chest.
280 grams - 5 Feeds today
|
29 days - a miniature Galah and full of
mischief!! 332.7grams - 4 Feeds Brooder
heat turned off during daytime for past few days cos she's fully feathered. |
Day 29 Brooder
Heat off all time.
It's around now they start to refuse to feed
-
to help them lose "puppy fat" ready to start flying. Hence messy
crop area! |
 |
 |
 |
|
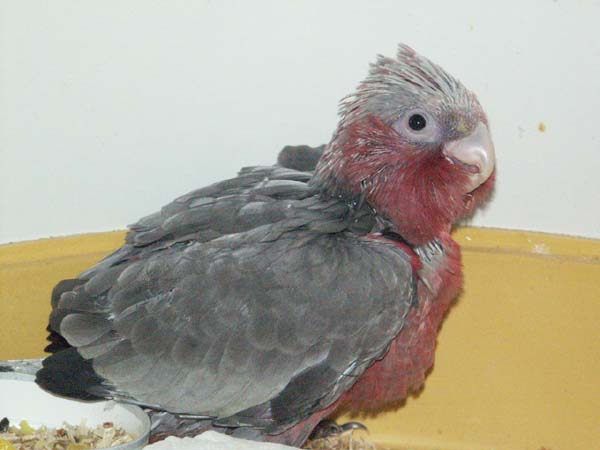
31 days - just about fully feathered
except for the short tail. In Brooder & picking at seed/sweetcorn in dish. |
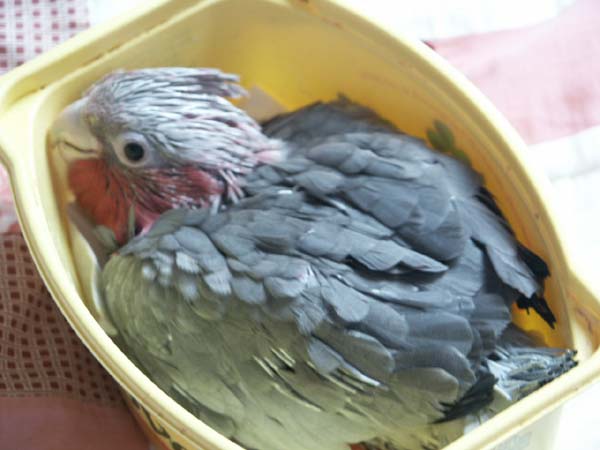
31 days - showing size filling a 500ml
Marge Tub. Compare to size at Hatch
& 19 days Pictures. 332 grams |
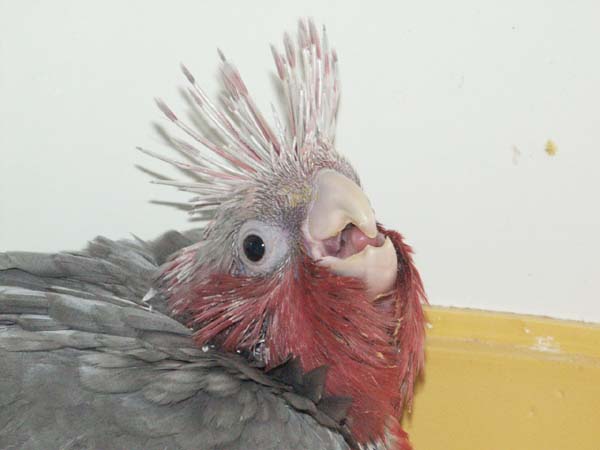
32 days - showing expression! She's in a
brooder NO heat. She has gained very little weight since
day 29 4 Feeds per day |
|
|
|
|
|
38 days - They
start getting diff. to feed as they start to wean from Day 29+ Hence mess!
Moved into Cage about now and took
Maiden Flight at 45 days - Energetic Flapping for a couple of
weeks prior to this, to strengthen wings.
340 grams |
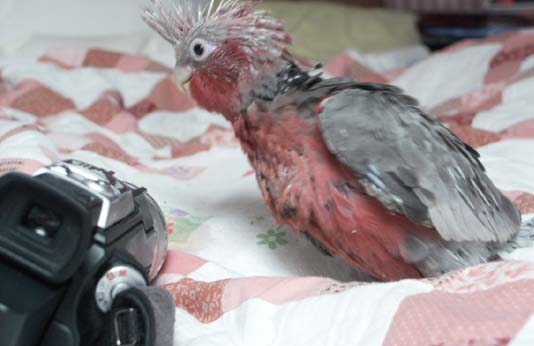
55 days- Now she can fly she's really into things. See how much leaner she is. She's very picky with her feeding. She still gets Topped-up 2-3 times per day at which time she only takes the absolute minimum to take hunger away! |
55 days - The Sweet smell of success! She's still on a
couple of feeds p.day. Plus Seed, millet spray Sweetcorn mxd with Eggfood &
a little shredded veg. Give as little sunflower seed as poss as Galahs
are prone to fatty lipomas in later life, which can lead to infertility,
esp. in the Hens |
|
 |
 |
 |
 |
|
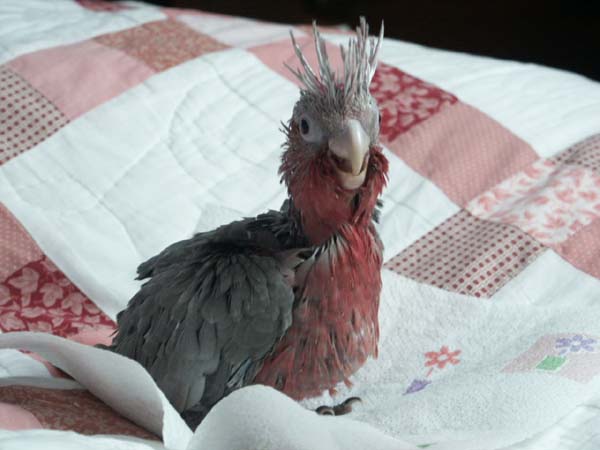
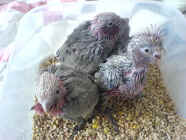
3 Galah Chicks a few days
old |
Same 3 chicks a couple of
weeks later |
This the chick that hatched out of this egg ► |
Fertile Egg 6 days old 17days
later the chick to the left hatched out of it |
|
N.B. The weights shown above are
specific to this particular chick's development - in subsequent
hatchings the weights of the chicks have often been rather less - this chick was a particularly good "Do-er".
As long as your
chick is eating well, increasing in weight on a daily basis + developing and growing well then you
have no reason to be concerned - the above is just a rough
guide.
DON'T overfill the crop tho. as it can overstretch and then u may find it has difficulty in completely emptying
This can bring it's own problems inc. sour crop
Make sure the crop fully empties x1 per day - usually overnight (last feed around midnight > first feed -approx 6a.m>)
^
Top
http://www.prettybird.com/researcharticles/handrearingarticle.htm
link to a very good page on problems you may encounter when Hand-rearing
chicks.
|
DISCLAIMER
Please also note that all the information on this website is provided in good faith but the Webmaster cannot
be responsible for any mis-information wheresoever or howsoever provided. All opinions, suggestions and
Advice are also given with all good intentions and in good faith but if in doubt should be verified as to their validity prior to accepting./implementing.
Any Medical Advice should never take the place of consulting with your own Avian Vet.
- When the Chick first hatches it still
has some of it's egg sac left.
- This is what supported it's nutritional needs while it was in the
shell.
- It needs to absorb this and do it's
first dropping BEFORE
you give it it's FIRST FEED.
- It usually takes approx. 8 - 12 hours after
hatch, to absorb the egg sac sufficiently.
- So, give your newly hatched chick at least this long b4 you give it's first liquid feed.
- If you feed too soon before this, you could run into all
sorts of problems.
- The Chick's First Feed should just be
Pro-biotic in warm water
- Feeding using a Teaspoon which has been
"bent-in" both sides, into the shape of a narrow "Funnel" is ideal.
- Gently does it into the beak.
- Don't tip the food in - hold the
spoon horizontal at first - NOT too fast or you could aspirate
(choke)
the chick if it goes into the Wind-pipe - this causes almost instant death!!
- Healthy chicks display a good "Feed Response" - if the chick is doing this then it has opened the food tube (oesophagus) and closed it's own Air passage (trachea)
- Just touch the spoon gently under tip of the top beak to encourage a
positive Feeding Response and then try and simulate the parent bird,
gently encouraging the chick to take the feed.
- Keep the spoon almost horizontal, so that the chick has some control
over the speed and amount of liquid / feed it takes.
- Some people use feeding syringes but if you are not used to feeding
this way, a spoon is the safer option.
- I usually use a spoon for the
first 8-10 days then when they are taking a lot more food at each feed
(esp. if you have a few chicks) progress to a 5ml syringe - you would
have to be careful not to push the plunger down too quickly - it's an
acquired art - take it slowly until you get the feel for it.
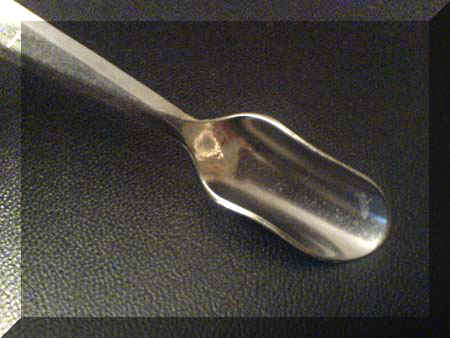 |
- A Spoon bent into a funnel shape. This one would be
ideal for bigger birds. A narrower one would be better for
smaller birds.
|
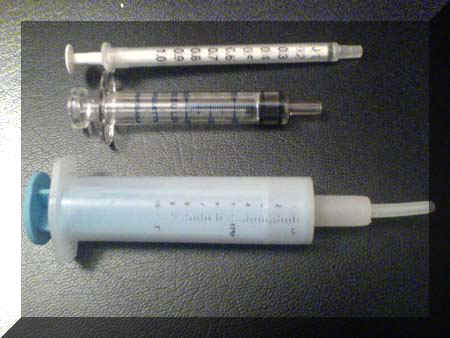 |
- 3 Hand-feeding syringes ranging from
1ml > 2ml >
5ml
up to 20ml+ for really big birds.
|
A Good Hand-Rearing food has all
the necessary vits, mins, pro-biotics and calcium requirements for the
specific bird it has been formulated for. - It is very unwise to add any extra vits, mins or calcium
supplements, as you will upset the delicate balance of the feed formula
and poss. do more harm to your chick than good.
- It's so easy at this young age to compromise the Liver by giving too many additives.
- Just recently I have had a couple of emails from people who have had hand-rearing problems and have been sold "Hand-rearing Formulas" that I haven't heard of and don't seem to work as the chicks are not thriving.
It's best to stick to tried and tested products if it's your first time!
- Check the labels on the Hand-Rearing
Food packet, to make sure you are using the correct Feed-mix for
the breed of Chick you are rearing.
- Each H-R Food manufacturer sells different formulas for different
Breeds of Birds with different fat/protein ratios.
- What suits one breed may not be right for another.
- What would suit an Amazon would def. not be right for an African
Grey!
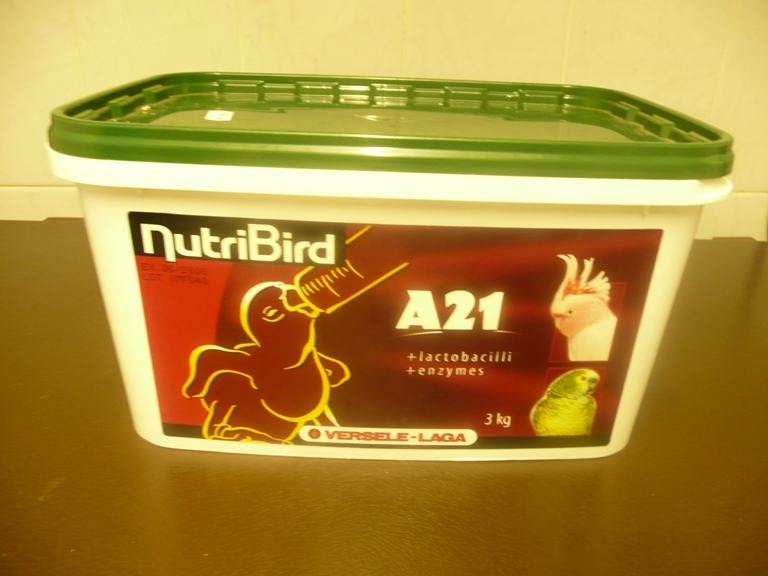
- The picture on the right shows Versele
Laga's A21 Hand-rearing food which ideal for Cockatoos & Amazons as it
has less fat content than their A19 which is higher in fat and for
A.Greys etc., Both have Lacto bacilli and Enzymes to aid
digestion.
- Pretty Bird and Kaytee also produce
Hand-rearing foods.
- Temperature of the Feed, as well as it's consistency, is paramount.
- If it is too cool or too thick,
for the age/type of chick, you can get crop stasis where the
food just sits in the crop and starts to ferment .
Not Good!
- Too cool - the chick will not really be interested in taking the food anyway. It has to be the correct Temp to create the Feed response.
See how to
check Temp. below:
- Too thick and the liquid part of
the feed will be absorbed out of crop and you can be left with a
dried lump of food that can cause problems and be literally hard to
get rid of safely.
- Too hot then you can seriously burn
the crop with dire results.
- Too thin, the chick will not
develop correctly and may get splayed legs and / or other growth
development problems,
- As the chicks grow, the consistency of the mix can be made
slightly thicker
- Get a reliable Food Thermometer and
read the instructions on the Hand-rearing food packet on mixing and
Temp.
- Another point to remember is not to put
too hot water in the Rearing Formula, when you are mixing it,
- as above a certain temperature it can destroy the good
pro-biotic bacteria in the formula.
- Also, remember when the chick is very young to either use pre-boiled
water or bottled water
- or use Avi-clens water steriliser in the water, heated to the
correct temp.
- Make sure your hands and spoons and bowls are
hygienically clean and sterile before you attempt to feed.
- Using Am-protect hand steriliser (similar to that used in hospitals)
- or wash your hands thoroughly, before you handle each
chick,
- esp. when they are very young, is paramount to avoiding
bacterial contamination / illnesses etc.
- Also, unless the chicks are siblings in the same
incubator/brooder it is wise to
make up a new batch of food for each chick
and use clean spoons
- - don't be tempted to use what one chick has left to feed
another.
- Beware of re-heating food to re-use - that's asking for food
poisoning!
- The crop can blow with gas with fatal results, if you are not
careful!
- Never leave old food sitting in dishes - clean
out as soon as you have finished feeding.
- Be aware that because you have to make
a small amount of food mix for young chicks,
- it will go cold very quickly and then you could experience the
"Crop stasis" problems as above.
- Each brand of feed mixes a little differently.
- So check their specific ratios of dry-mix to water.
- If the food is not the correct temp. for the chick you will not
get a Good Feed Response from them.
- Using a baby's weaning cup with a space for hot water for the
feed cup to sit in should help keep the food at the correct temp.
- A handy "rule of Thumb", if you haven't a thermometer to hand, is to test the mix on the inside of your wrist, as you would a human baby's.
- It must just feel slightly hotter than
blood heat
-
but not feel "hot"!
- NOT HOT! It is wise to test each spoonful this way
prior to feeding it, esp. when the chick is very young.
- Human blood temp = 37degC or 98.4degF ( the temp
to feed at hatch is 41degC or 106degF )
- It's always better to be safe than sorry!
^ Top
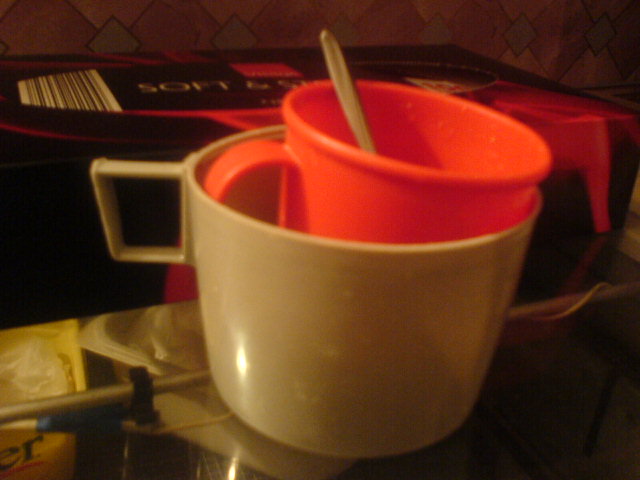 |
- A handy tip to help keep
your H-rearing Food warm.
-
Use 2 plastic flask
cups
- put 1"
hot (not boiling) water
in the bigger one
- sit smaller one, containing feed,
into bigger one.
- Keep testing formula B4 you feed, just
in case it
gets
too hot and burns chick's crop!
|
A Rough Guide to the Average TEMPERATURES in the BROODER
|
2-6 Hours after hatch |
36.9 deg C |
|
1-3 days after hatch |
36.4 deg C (97.5degF) |
|
4 - 5 days old |
35 deg C |
|
5 - 9 days |
34 deg C |
|
9 - 12 days |
33 deg C |
|
12 -14 days |
32 deg C |
|
14 - 16 days |
31 deg C |
|
16 - 18 days |
29.5 deg C |
|
18 + when feathers start to form |
When feathers cover wings, head & breast
i.e. fairly well feathered start at 27.5deg C reducing to 25.5 deg C. 29 days (depending on weather)
Heat off during day and on low at night
32+ days fully feathered - in Brooder
- No heat necessary unless very cold. |
|
Ideal Humidity 30 - 40 % +/- |
|
TEMPERATURE problems:
-
Chicks that are panting, holding their wings away from
their bodies are too hot.
-
The temperature should be lowered by one degree and
the chicks carefully monitored.
-
If the chicks are still panting, the temperature
should again be lowered by another degree until the chicks are
comfortable.
-
Chicks that are too hot may become dehydrated which
causes problems with the crop emptying and causes an imbalance in
the electrolytes.
-
If this happens, it needs to be corrected as soon as
possible, as it has serious implications for the chicks.
-
Dehydration is one of the causes of sour crop and crop
stasis which is fatal if not caught in time.
-
Equally as dangerous are chicks who are huddling
together and shivering,
-
You must keep a regular eye on how your chicks are
behaving.
-
If the chick is too cool then digestion becomes
sluggish
Food then stays in the crop too long and you can get fermentation in the crop, where
it blows up with gas. This can create bacterial problems You can also get Crop stasis, where the food
passes thru too slowly and the moisture is absorbed first and it
can often leave a hard lump of dry food, which is not easy to
get rid of, esp. if the chick is col
CHICKS EYES
-
Newly hatched chick's eyes are very sensitive to
light.
-
The eyes open between the seventh to the tenth day.
-
Chicks are not exposed to high levels of light in the
wild until between 6 - 8 weeks of age,
-
Too much light at very young ages causes the chicks to
be very active at a time when they need the calories they consume
for weight gain.
-
With too much light, the chicks are using their energy
for play and socialization at a time when the calories are needed to
support growth of vital organs, muscles, bones, and tissues.
-
Chicks should be allowed to have the best possible
weight gain.
-
Brooding the chicks in darkness is most assuredly
going to retard the socialization of the chicks.
-
However the weight gain is much more important to the
chick's survival and much more natural.
-
I personally turn the "glass" side of the Brooder
to the wall after I have put the chicks back after a Feed
and often will hang a piece of dark cloth/towel over the "glass" to keep the
chicks as dark as possible.
-
This is much more in keeping with conditions they would
have in a Nest box in the wild.
-
Try not to feed the chicks in a bright lit area -
-
Keep the lights bright enough to see what you are
doing
-
but subdued enough, so as not to expose the chicks
to too bright light.
CLOSED RING SIZE
:
"U"
A lot of Ring Manufacturers recommend size "T" but I think this is a bit
on the neat size, and if the leg ever swells, even slightly in the future due to age or maybe an injury or scratch etc. Then the ring ends up tight on the leg and very difficult to remove. So a lot of Breeders use the next size up Size "U" which is much
better.
AGE TO CLOSE RING :
Size "T" 12 - 14
days
Size "U" 14 - 16 days
The chicks below haven't been
hand-reared but they do emphasise the importance of correct feeding
|
☼
I thought this
was an interesting photo:
When you look at this
photo (click to enlarge) which Rosa Bourke chick would you say was
the older of the two??? Bet you all say the one at the back
when in fact the one the front is one day older than it!! This
is just an example of chicks not being fed correctly. The smaller
one was fed by a first-time young hen who appeared to feed the chick
well. Its crop was always full but looked "lumpy" as if
whole seeds or whole seed kernals were in there and they
hadn't been partially digested by the hen first. The back chick was
fed by a 2 year old hen who raised a couple of clutches of chicks
successfully last year. Her chicks' crops always look smooth,
as if there was plenty of moisture in there and the food had been
partially digested first. Both hens were fed the same food too
incl. egg-food. The chick has now been give to the 2 yr old
hen to "finish-off" and it is growing nicely now. I just hope
the younger hen fairs better with her 2nd round - practice makes
perfect - I hope!! |
 |
** Link to a very good page on problems you
may encounter when Hand-rearing chicks :
http://www.prettybird.com/researcharticles/handrearingarticle.htm
 ^ Top ^ Top
|
|